
Systeme.io Funnel: 7 Proven Steps to Launch a Stunning Funnel
Learn how to build a high-converting Systeme.io funnel in 7 simple steps. This practical guide covers everything from choosing templates and setting up email automation to adding one-click upsells and connecting payment gateways, perfect for digital coaches and online teachers looking to scale on autopilot.
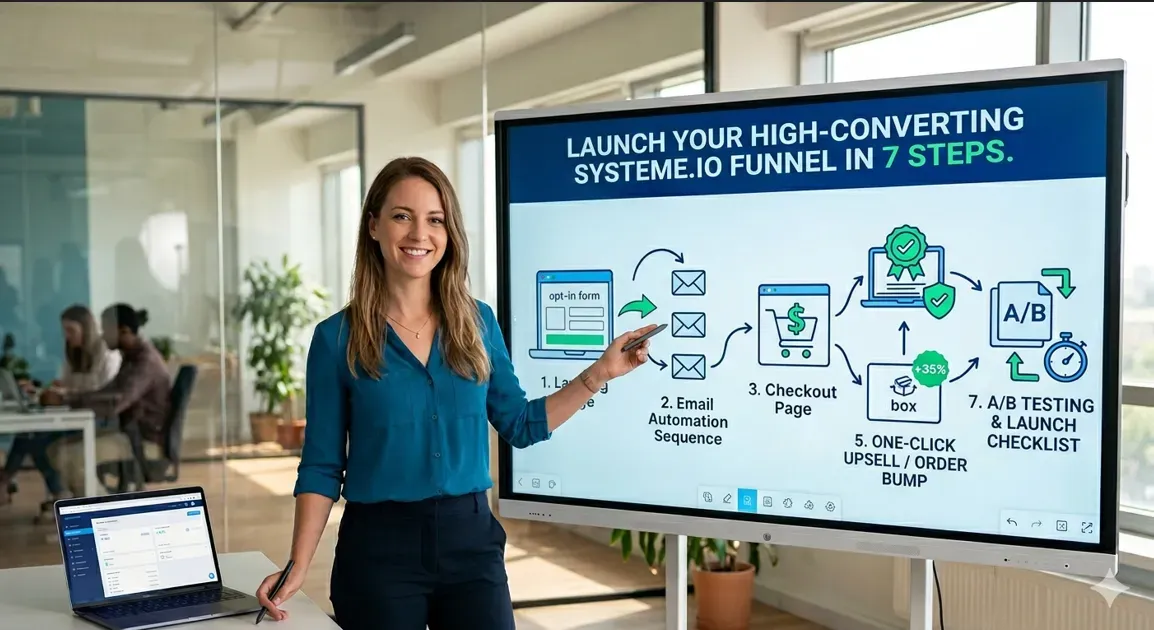
Table of Contents ▼
Quick Answer
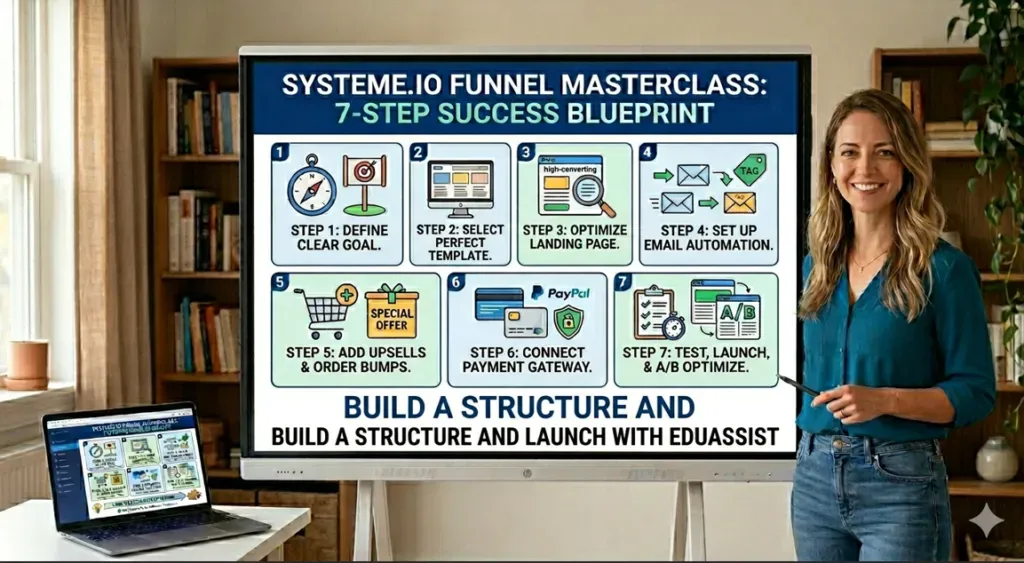
This guide explains how beginners can build and launch a Systeme.io funnel in seven steps. It covers setting a clear funnel goal, choosing a template, designing a landing page, setting up email automation, adding upsells and order bumps, connecting payment gateways, and testing the funnel before launch. It also provides optimization tips and answers common questions about Systeme.io funnels.
Key Takeaways
- Start with one clear funnel goal before choosing pages, offers, or automations.
- Use landing pages, email automation, upsells, and payments to create a complete funnel.
- Test and optimize after launch instead of assuming the first version will perform perfectly.
Are you ready to build a Systeme.io funnel that actually converts? Many course creators waste hours trying to figure out where to start. However, the process is simpler than most people think. In this guide, you will learn seven proven steps to design and launch a stunning funnel even if you are a complete beginner. Whether you are a digital coach or an online teacher, a well-built system helps you grow your list fast. Additionally, it helps you sell your products and earn money on autopilot. Therefore, let us get straight into step one.
Step 1: Set a Clear Goal for Your Systeme.io Funnel
Before you build anything, you must first decide what your Systeme.io funnel should do. This is important because every funnel serves a unique purpose. Therefore, picking the right goal from the start will save you a lot of time. Moreover, a clear goal makes it much easier to choose the best funnel type inside the platform. Consequently, you can focus your efforts on what truly matters for your business.
Common funnel goals include:
- Collecting email leads with a free guide or checklist
- Selling a digital product or online course
- Running an evergreen webinar to generate daily sales
- Promoting a coaching package or group membership
First, log into Systeme.io and click on “Funnels” to get started. Next, choose a goal that fits your offer, such as building an audience or selling a product. Once you do this, the platform automatically sets up your basic pages. As a result, this simple process saves you even more time.
Step 2: Choose the Right Funnel Template
To begin with, Systeme.io offers a large library of ready-made templates. These designs are clean, work well on mobile, and are built to convert. In addition, every step of your funnel has its own set of layouts. Because of this, you can easily mix and match styles. Ultimately, this allows you to create a unique design that stands out.
When choosing a template, keep three things in mind:
- Pick a layout that puts your call-to-action front and center
- Choose a design that matches your brand colors and style
- Avoid busy pages; simplicity almost always converts better
The platform uses a simple drag-and-drop editor. As a result, you can customize every part of your page without any design skills.**** While the templates look professional right away, you can still change the text, colors, and images with ease. It’s easy to make the page match your brand perfectly.
Step 3: Design a Landing Page That Converts
Your landing page is the first thing visitors see. Because of this, it has the biggest impact on whether someone stays or leaves. A good landing page for your funnel should be clean, short, and focused on one action.
Key elements of a high-converting landing page:
- A strong headline that speaks to your audience’s main problem
- A short list of benefits that the visitor will gain
- A simple form that asks only for a name and email address
- A bold CTA button with words like Get Free Access or Start Now
- A mockup or photo to make your offer feel real
Additionally, you can use the editor to add social proof or countdown timers. Since these elements build trust quickly, they are very effective. For this reason, your opt-in rate can increase significantly with just a few small additions. Ultimately, these simple tweaks turn more visitors into leads.
Want to learn more about designing effective online learning pages? Read this guide: Instructional Design Services for Custom eLearning Development at TheEduAssist. It covers how strong design directly improves learner engagement and outcomes.
Systeme.io Funnel Plans vs. ClickFunnels
Before you invest time building, it helps to see what each plan offers. Therefore, here is a quick side-by-side comparison:
| Feature | Systeme.io (Free) | Systeme.io (Startup) | ClickFunnels Basic |
|---|---|---|---|
| Sales Funnels | 3 | 10 | 20 |
| Email Marketing | Unlimited | Unlimited | Add-on cost |
| Course Hosting | Yes | Yes | No |
| A/B Testing | Yes | Yes | Yes |
| Monthly Cost | $0 | $27 | $127 |
As you can see, Systeme.io gives creators more value for less money. Moreover, it includes tools that others charge extra for.
Step 4: Set Up Email Automation
A Systeme.io funnel works best when email automation runs in the background. As soon as someone opts in, your funnel should follow up. Fortunately, the system has a full email tool built right in.
Here is a simple starter workflow:
- Trigger: A visitor fills out your opt-in form.
- Action: Add a tag to organize the new lead.
- Next: Send a welcome email with your freebie.
- Follow-up: Enroll them in a 3 to 5 email sequence.
Furthermore, you can send unlimited emails on all plans. Therefore, you can grow your list to thousands of fans without paying extra fees. Since email marketing has a high return on investment, this makes your funnel a very smart move.
Step 5: Add Upsells and Order Bumps
Once your core funnel is live, the next step is to increase your sales. Systeme.io makes upselling very easy. You can add one-click upsells and order bumps without any coding.
To add an upsell:
- Create a new funnel step after your checkout page.
- Select the Upsell page type and pick a template.
- Add your product and set the price.
- Connect the automation so buyers are tagged correctly.
In addition to your main offer, an order bump is a great way to earn more. This small add-on appears right on the checkout page. Because the buyer is already ready to pay, these offers convert very well. Even though it is a simple change, it can boost your income over time. Consequently, adding one is a smart move for any seller.
Step 6: Connect a Payment Gateway
Your funnel needs a way to collect money. Luckily, the platform supports Stripe, PayPal, and Apple Pay. Setting up payments takes only a few minutes. Moreover, there are zero transaction fees so every dollar stays with you.
Follow these steps:
- Go to Settings and click on Payment Gateways.
- Select your provider and enter your keys.
- Link your product to the payment method on your checkout page.
After connecting, do one final check. Make sure your product is linked and the price is right. Since small errors can stop sales, testing your checkout is a step you should never skip.
Need help structuring your course content before you sell it through a funnel? Read this practical guide: How to Create Self-Guided Learning Experiences with TheEduAssist. It explains how to build structured, self-paced learning paths your students will love.
Step 7: Test, Launch, and Optimize
Before you go live, always test your funnel. Click every button and fill out every form. This one step prevents errors after you launch. Therefore, treat testing as a must-do part of the process.
Pre-launch checklist:
- Test the opt-in form and check the automation.
- Make sure welcome emails land in the inbox.
- Place a test order to see if the payment works.
- Review every page on your phone and computer.
After launch, use the built-in A/B testing tool to get better results. Test different headlines or button colors. Even small changes can lead to big wins. Additionally, check your stats each week to see what is working.
Bonus Tips to Get More From Your Funnel
- Keep your landing page copy short and simple.
- Use testimonials to build instant trust.
- Add a countdown timer to create a sense of urgency.
- Segment your list with tags for better targeting.
- Use the community feature to keep students happy.
Conclusion
Building a Systeme.io funnel is one of the smartest moves you can make. By following these seven steps, you will have a funnel that looks great and works hard. Moreover, because the platform handles everything in one place, you save a lot of time and effort.
Start today. First, define your offer and design your page. Then, let your funnel do the selling for you. Although the setup takes some work at first, the results will help you every day. Therefore, the time you invest now will pay off for a long time to come.
Authored by: Laiba Ayaz
Sources & References
- Systeme.io Official Sales Funnel Guide: Complete platform guide on building and optimizing funnels with Systeme.io tools.
- Neil Patel: A Straight-Forward Guide to Funnel Optimization. Expert strategies for testing and improving sales funnel conversions.
- HubSpot: How Conversion Funnels Create a Better Customer Journey: In-depth breakdown of funnel stages, buyer journeys, and conversion optimization.
Frequently Asked Questions
QWhat is a Systeme.io funnel?
A [Systeme.io](http://Systeme.io) funnel is a series of web pages that guide a visitor toward one specific action, such as joining your email list or buying a product. Because everything is built inside one platform, you do not need separate tools for landing pages, email marketing, or payments.
QIs Systeme.io free to use for funnel building?
[Systeme.io](http://Systeme.io) offers a free plan that includes up to three sales funnels. Moreover, the free plan also includes unlimited email sending, automation rules, and the ability to sell digital products with zero transaction fees, making it one of the best free funnel builders available today.
QHow long does it take to build a Systeme.io funnel?
With a clear offer and a ready product, you can build a basic [Systeme.io](http://Systeme.io) funnel in 30 minutes to two hours. However, a more complex funnel with upsells, automations, and custom design may take a few hours to a full day. Therefore, having your copy and images ready before you start will save you significant time.
QCan I sell online courses through a Systeme.io funnel?
Absolutely. [Systeme.io](http://Systeme.io) includes full course hosting features on all plans. You can upload videos, organize lessons into modules, and link your course directly to a funnel checkout page. Additionally, students get automatic access after purchase, so you do not have to manually enroll anyone.
QHow do I drive traffic to my Systeme.io funnel?
You can drive traffic through organic social media, YouTube content, email marketing, SEO blog posts, or paid ads on Facebook and Google. Since course creators often already have knowledge to share, a free lead magnet or YouTube tutorial tends to be one of the most cost-effective traffic sources for a new funnel.
QDoes Systeme.io support A/B testing for funnels?
[Systeme.io](http://Systeme.io) has a built-in A/B testing tool. You can test different versions of your funnel pages to find out which headlines, images, or CTA buttons perform best. As a result, you can improve your conversion rate over time based on real data rather than guesswork.
QWhat is the difference between a Systeme.io funnel and a ClickFunnels funnel?
Both platforms let you build sales funnels, but [Systeme.io](http://Systeme.io) is far more affordable. Moreover, it includes email marketing, course hosting, and automation at no extra cost features that ClickFunnels charges separately for. Therefore, for course creators and coaches who are just starting, [Systeme.io](http://Systeme.io) is usually the smarter and more cost-effective choice.